Wednesday, August 25, 2010

iPad – How to enable accessibility / zoom options in iOS


This recipe explains how to enable accessibility options on the Apple iPad that can assist those with vision impairments or bad vision. The iPad’s OS (iOS) has accessibility options that we can enable to make reading and navigating much easier by zooming the screen in and in turn enlarging the view. Navigation and zooming is done via three finger gestures.


1. On your iPad go to Settings > General


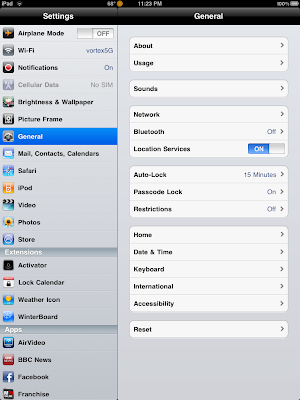
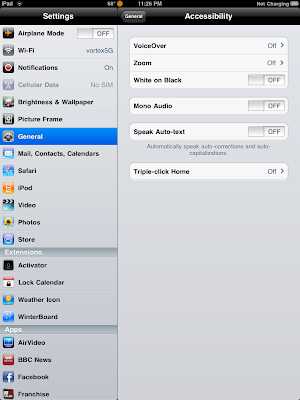
2. Touch on Accessibility. In here, we will want to go into Zoom


4. Turn on Zoom.


Now once you exit you will notice that your screen will be zoomed in on the upper left area of the screen. You can zoom out, navigate zoom with three finger gestures.

Enable / Disable ZoomDouble Tap with three fingers

Move/Navigate while zoomed inDrag with three fingers in direction to move

Change Zoom levelTap twice with three fingers, then hold and move up or down to zoom in or out.

Read Full Entry

Sunday, August 8, 2010

How to Reverse the Jailbreak of Your iPhone, iPod Touch, or iPad (Unjailbreak)


If you’ve modified your iPhone, iPod Touch, or iPad and are now second guessing your decision to jailbreak your device, you can undo the modification and run your device normally. This can be quite useful if your device has been experiencing performance issues since applying the jailbreak.

1. Connect your iPhone, iPod Touch, or iPad to your computer and open iTunes.


2. Select your device from the left column.


3. Go to the Summary tab.

4. In the Version section, click the Restore button.


5. You will be asked if you want to back up the settings for your device before restoring, click the Back Up button.


Your settings will then be backed up and the Restore function will start.

Once the Restore function has completed, your device will be in a “nonjailbroken” state.

Read Full Entry

iPad / iPhone : Setup Gmail as an Exchange Account / Full Calendar, Email, Contact Syncing and Push Support


This recipe will explain how to setup your iPad or iPhone to use Gmail as an Exchange Account and in turn allow you to sync your Google Calendar, Gmail Email and Contacts to Google over Exchange (Push email). Google has been gracious enough to allow full Exchange and Push support for the iPad and iPhone.

Setting up your Gmail / Google Exchange account.


1. Go to Settings > Mail, Contacts Calendars > Add Account

2. Choose Microsoft Exchange


Fill in the form as such.
  • Email: your gmail address
  • Username: gmail user name
  • Password: gmail password
  • Description: anything you like (by default does your username)


Tap Next

3. It will prompt to accept a Certificate, tap on Accept.


4. Next, it will then ask you for the Server address.

We will enter: m.google.com

Tap Next once we have this filled in.


5. Lastly we will be asked for what items we want to sync. By default Calendar, Contacts, and Email should be ON. Tap Save when your done. The account should now be all setup.


To configure your Sync options, once your done; go back to Settings > Mail, Contacts, Calendars and then Tap on the Account we just made to change the Days to Sync options, etc.

However, if your like me and have multiple calendars; only your main default one will show. We can allow syncing of multiple calendars via a Google Sync page.

6. On your iPad / iPhone, open Safari and go to m.google.com/sync

7. Click on your Device and then choose the Calendars you want to sync. Click on Save and your other Calendars will start syncing.

NOTES:

  • -To get a grip on your Contacts in Gmail, go to your Gmail account and click on Contacts. I would recommend using Groups and then adding common Contacts to the appropriate Group. By default, Gmail will not add any of your contacts to this Contacts list; but will keep them in the Global Address List (GAL) so you can still search ALL of your Gmail Contacts
  • -Gmail by default will add anyone you send an email to to the “Other Contacts” list. Again, you have to move contacts to your “My Contacts” list to get them to show in the Address Book.

Read Full Entry