This recipe explains how to easily add custom news results to your nexus one’s homescreen News Widget and News reader application.
The news widget will parse news results from Google News.
You can easily add your own news results to the widget.
This recipe explains how to easily add custom news results to your nexus one’s homescreen News Widget and News reader application.
The news widget will parse news results from Google News.

Android provides a way to quickly access menus and functionality by doing a long press ( a press and hold) of buttons or keys. These shortcuts can be a real timesaver.
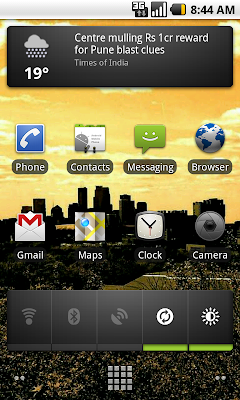
Long Press on the Home screen itself, will allow you to add Shortcuts, Widgets, Folders or change Wallpapers.
Long Pressing an icon or widget on the Home screen will allow you to move or delete the icon/widget.

You probably know that accessing a comma, semicolon, colon, math symbols, etc. from the Numbers Keyboard (; : , / & @ ( ‘ ) ” – + ? or !), but having to switch back-and-forth gets to be a pain when you’re trying to input some text quickly. Luckily, you can access these symbols and punctuation from the Letters keyboard.
1. When you are ready to use one of the these symbols (; : , / & @ ( ‘ ) ” – + ? or !), you can do this by long pressing the period key on the letters keyboard.

2. A small window pops up allowing you to select the desired symbol.

Once selected, you return to the Letters keyboard.

Just like your computer’s web browser, the Android web browser on your Nexus One allows you to set the homepage to a site that it will initially start with whenever the browser is opened.
1. Open the Browser application.

If you wish to include other recipients to a composed email message, even though they aren’t the primary one, you can use Cc or Bcc to do this. Cc (carbon copy) will send the message, allowing all recipients to see the address of the Cc recipient while Bcc (blind carbon copy) will keep all addresses included in its field from being displayed to recipients of the message. This can be done in either the Mail app or the Gmail app.
1. Open either the Mail or Gmail application.
2. Select the Menu key.
3. Select Compose and address it to the primary recipient in the To field
.
3. Select the Menu key.
4. Select Add Cc/Bcc. In the Mail app it will be on the left,

while on the Gmail app, it is on the right.

5. Add the desired recipients in the appropriate field(s) and send your message.

I only use Google Talk periodically, so I have no need for the Talk application to automatically sign onto my account every time that I happen to turn on my phone. Here’s how stop this.
1. Open the Talk application.
2. Select the Menu key.
3. Select More.

4. Select Settings.

5. Uncheck the Automatically sign in checkbox.

If you would like to keep your Nexus One’s screen on while it charges so that you can make use of applications like the Clock app, you can but you need to know where to look.
1. Go to the Home screen.
2. Select the Menu key.

If you want to use an application that you recently used, instead of hunting for it via the Launch button, you can access the Recent Applications window and quickly access the application from there.
1. Go to the Home screen.
2. Longpress the Home key.
3. The Recent Applications window will appear.

Select the desired application or tap the Back key to exit the window.

Situations arise where you need calls from a contact to go to Voicemail instead of answering their calls. You can set your Nexus One to send calls from a contact to voicemail automatically and directly, so that your phone will never ring when they call.
1. Open your Contacts.
2. Select the name of the desired contact.
3. Select the Menu key.
4. Select Options.

5. Check the Incoming calls checkbox.

When you are ready to once again receiver their calls, simply repeat the above steps and uncheck the Incoming calls checkbox.

By default, the Nexus One limits text messages to 200 messages per conversation. You can change this value to one that better meets your messaging needs.
1. Open the Messaging application.
2. Select the Menu key.
3. Select Settings.

4. Select Text message limit.

5. Use the + and - to change the value to the desired number or tap the number and use the keyboard to input the desired value.

6. Select Set.

To help preserve battery power, the Nexus One has a screen timeout setting that will turn the screen off after a certain amount of time that there is no activity. You can change the delay time and extend or reduce the amount of time before your device’s screen turns off.
1. Go to the Nexus One’s Main screen.
2. Select the Menu key.
3. Select Settings.

4. Select Sound & display.

5. Scroll to the bottom and select Screen timeout.

6. Select the desired delay time. Choices are 15 seconds, 30 seconds, 1 minute, 2 minutes, 10 minutes, or 30 minutes.


By using folders to group your various application shortcuts, you can stay organized and preserve precious Home screen real estate.
1. Go to the Home screen and long press and empty space on the screen until the Add to Home screen menu appears.
2. Select Folders.

3. Select New folder.

4. You will now have an empty folder appear on the Home screen with the generic name Folder. Time to change the name to a more useful label.

5. Tap the newly created folder to open it.
6. Long press on the title bar of the new folder.

7. When the Rename folder window appears, tap inside the textbook to bring up the keyboard.

8. Change the name to a desired label and tap the OK button.

9. The folder will now have the desired label. It’s now time to populate the folder with the desired shortcuts.

There are two different ways to place a shortcut inside a folder.
1. Drag an existing shortcut that is residing on the Home screen onto the folder.

2. Open the folder and then tap the Launcher icon to view your installed applications. Long press on an application’s icon to make a shortcut for it appear inside the folder.

When you are finished, you will have quick access to multiple applications and only take up one icon’s space on the Home screen.


If your device is connected to a wireless network, why watch YouTube videos in standard resolution when you can watch them in high res? In a couple of taps, you can view the video that you’re watching in high resolution.
1. Open the desired video in the YouTube application.
2. Once the video begins playing, select the Menu key.
3. Select More.

4. Select Watch in high quality.


When I frequently make calls to automated systems that require an additional digit or extension to be dialed, I like to add these dialing key presses into my contact’s number with dialing pauses as appropriate. The Nexus One makes it easy to put pauses into a contact’s phone number.
When editing a contact’s phone number and you are ready to insert a pause, tap the *#( key at the lower left of the screen.

To insert a pause, simply tap the Pause key.

To return to the numeric keyboard, tap the lower left 123 key.
The phone number displayed on the screen will show a comma where a pause has been inserted. For longer delays you can insert more pauses.

If your Nexus One device is constantly flip-flopping between 3G and EDGE data service, even though 3G is available, you can force it to use 3G only until a fix is released for the device.
1. Select Phone.
2. Dial the following:
*#*#4636#*#* 3. The Testing screen will appear.
4. Select Phone information.

5. Scroll down to Set preferred network type:
6. Select the dropdown (the current value should read WCDMA preferred).

7. Select WCDMA only.

8. Go back to the Home screen and wait for your phone to reconnect to the network.